Set up myUSBdrive in about half an hour
You're only busy for a few minutes of it. Most of the time is your computer downloading and writing the SD card, so you can set it going and make a cup of tea.
Prefer to watch it done first? Watch the setup walkthrough.
Three things that trip people up
- Leave your USB drive unpluggeduntil step 10. Some Pis try to start from it and the first start-up fails.
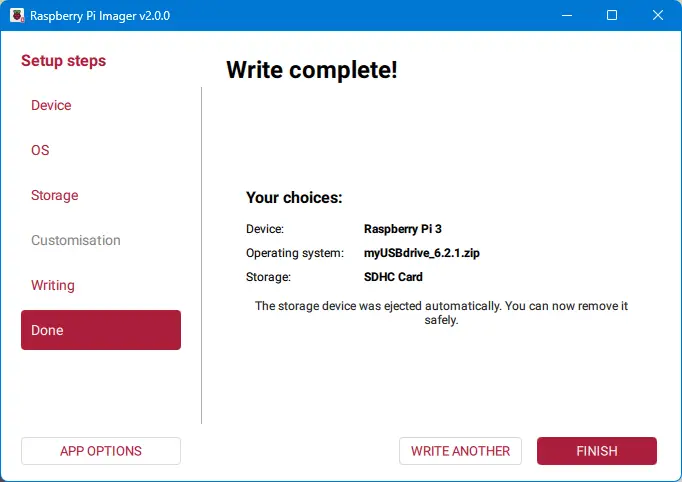
- Wait for "Write complete!"before taking the SD card out, even when Imager looks finished.
- Scroll inside the licence box,not the page. The tick boxes unlock when the licence text reaches the end.
Before you start
- A Raspberry Pi 3, 4 or 5, with its power supply
- A 16GB or larger SD card rated A1 or A2 (test it first on Windows)
- A card reader for your computer
- A network cable to your router
- Raspberry Pi Imager, free from raspberrypi.com/software
- The myUSBdrive file from the download page
- Your USB drive, which you plug in at step 10
Part 1: Write the SD card
On your computer, about 20 minutesSelect your Raspberry Pi model
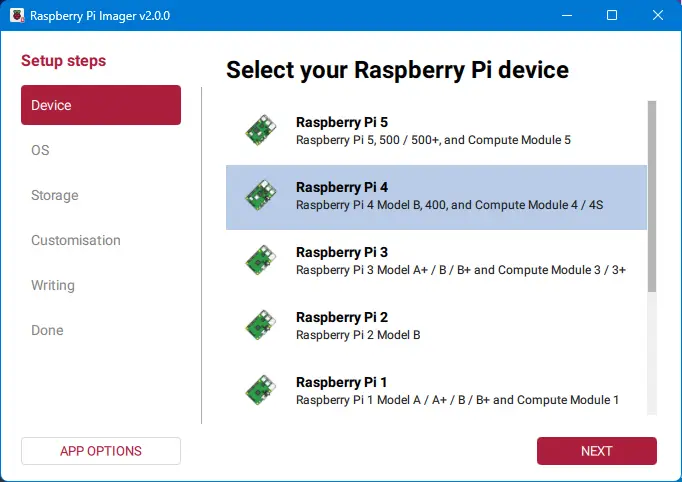
Open Raspberry Pi Imager and click Choose Device. Select your Pi model from the list. Pi 3, Pi 4, and Pi 5 are all supported.
 Click a picture to enlarge it
Choose the myUSBdrive image
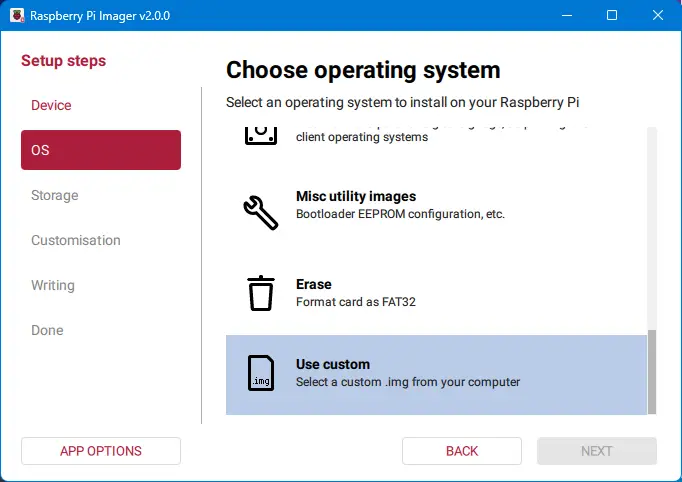
Click Choose OS. Scroll to the bottom of the list and select Use custom, then browse to the myUSBdrive zip file you downloaded.
Clicking Use custom opens a window for choosing a file. Browse to your Downloads folder, or wherever you saved the download, select the myUSBdrive ZIP file and click Open. There is no need to unzip it first.
 Click a picture to enlarge it
Select your SD card
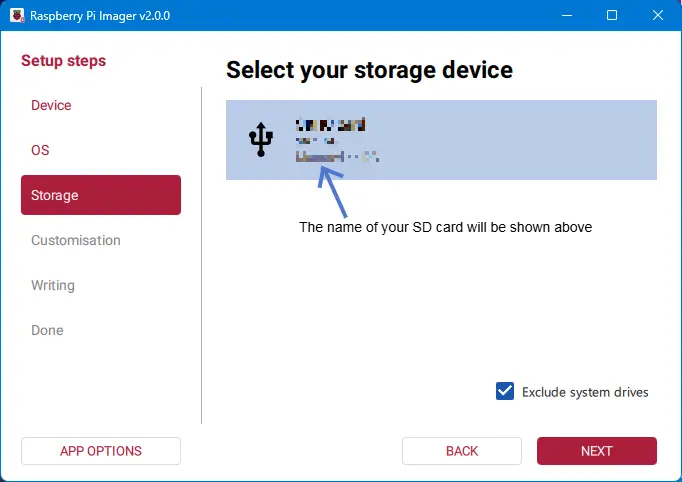
Click Choose Storage and select your SD card from the list. Raspberry Pi Imager will only show removable drives, so your computer's own drives are not at risk.
 Click a picture to enlarge it
Start writing
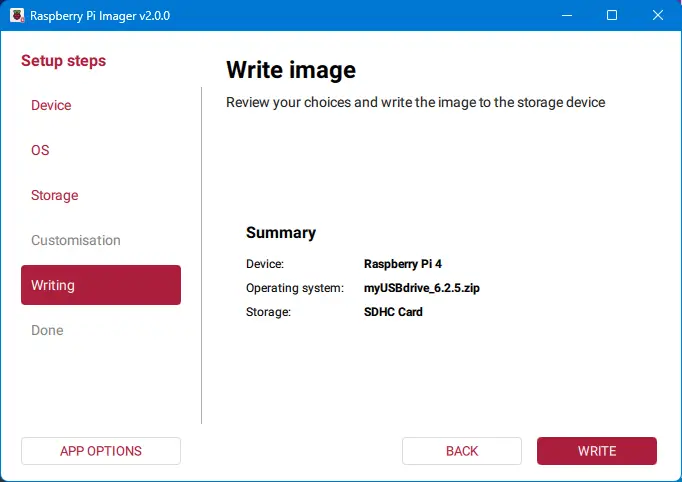
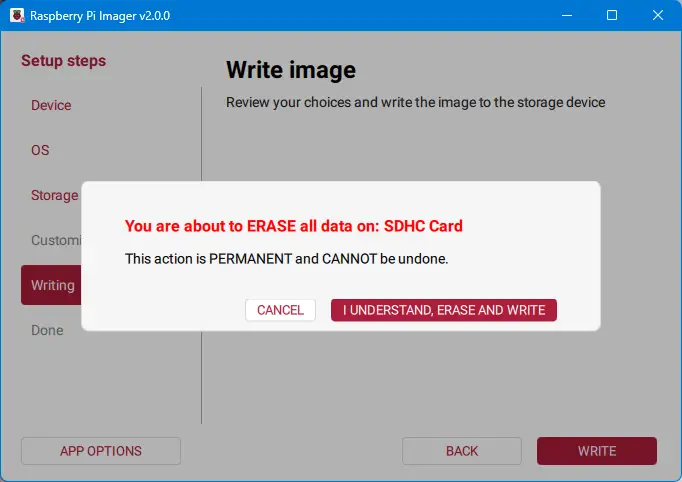
Click Next. Raspberry Pi Imager will warn you that all data on the SD card will be erased. This is permanent. Click I Understand, Erase and Write to continue.
 Click a picture to enlarge it
Done. Your SD card is ready
When you see Write complete!, your SD card is ready. Click Finish and remove the SD card from your computer.
 Click a picture to enlarge it
Part 2: First-time setup
On the Pi, about 5 minutesConnect your Raspberry Pi and switch it on
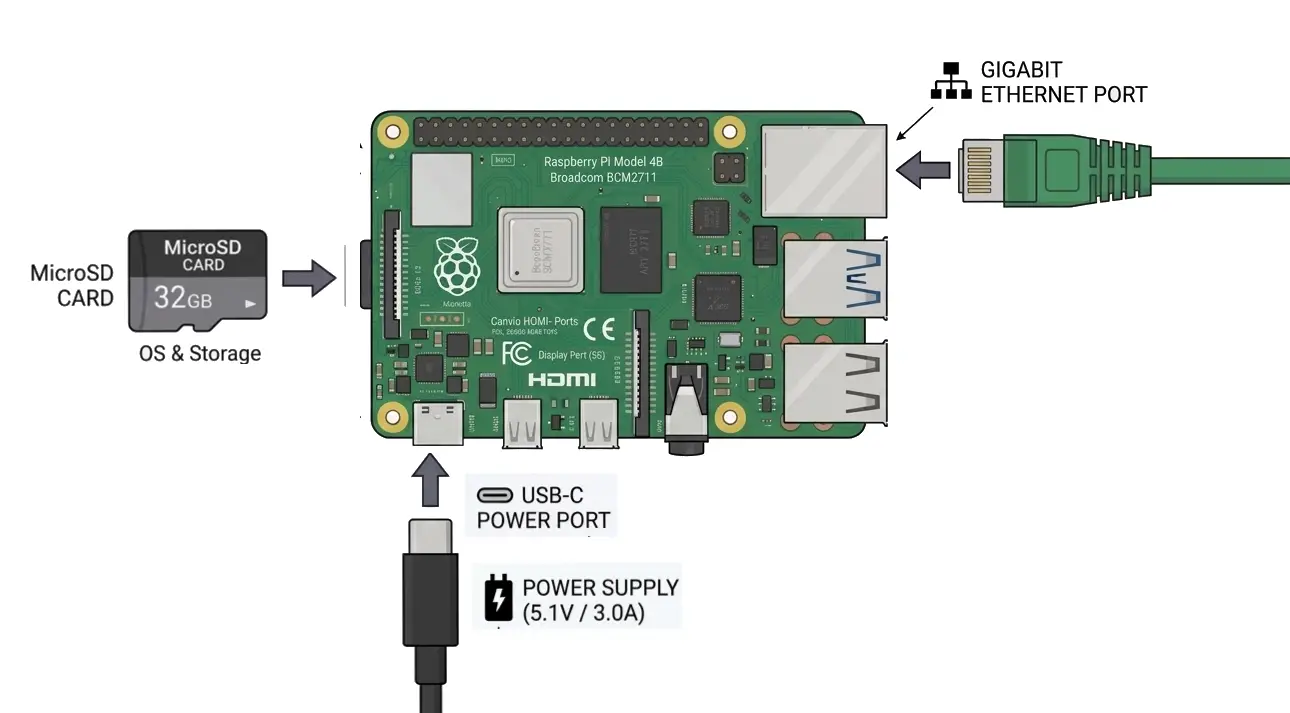
Do these in order, and plug the power in last:
- Push the microSD card into the slot on the underside of the Pi, contacts facing the board, until it sits flush.
- Plug a network cable into the Pi's network port, with the other end in your router or a network switch.
- Finally, plug in the power supply. The Pi has no power button, so it starts straight away.
 Click a picture to enlarge it
Open myUSBdrive in your browser
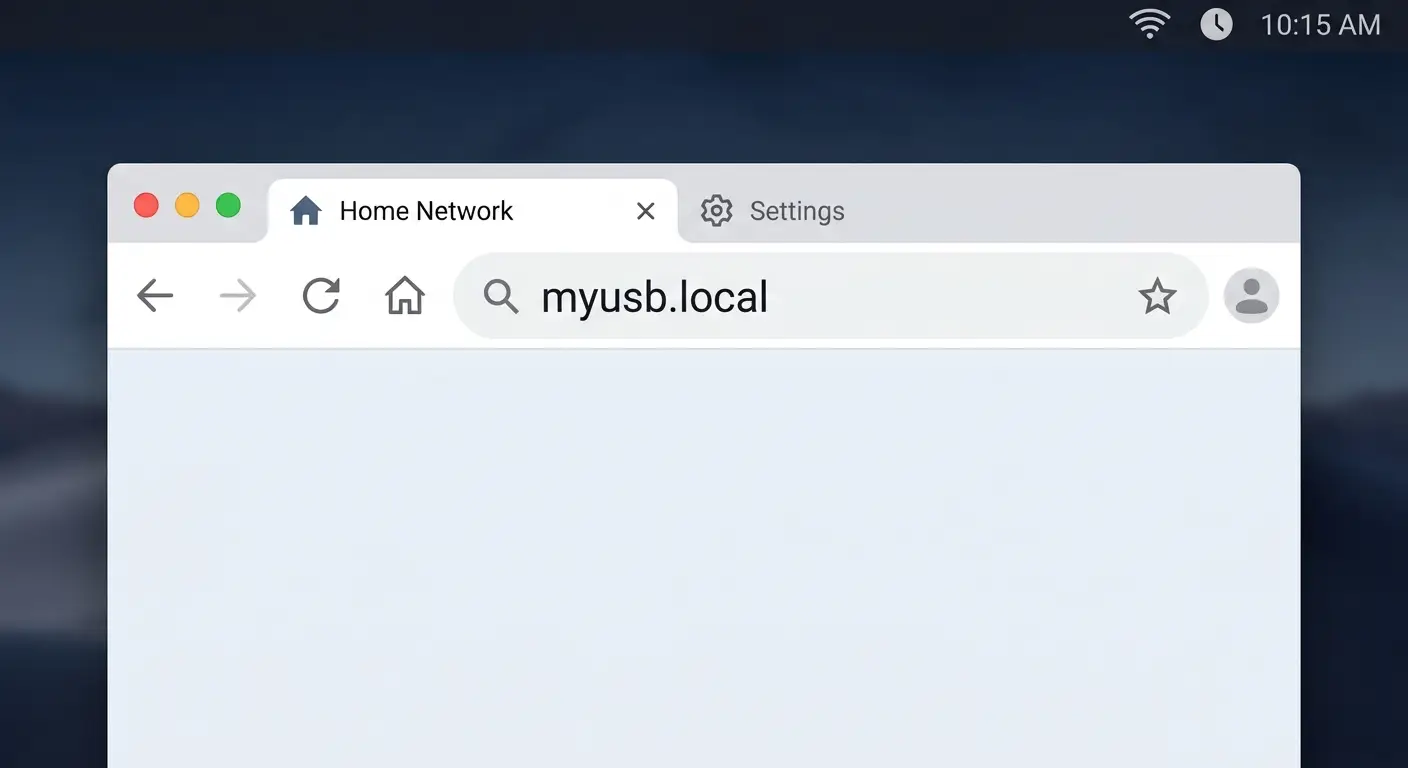
Give the Pi a couple of minutes to start up the first time. Then, on a computer or phone connected to the same network, type myusb.local into the browser's address bar and press Enter. The setup screens below will appear.
 Click a picture to enlarge it
Read the full licence agreement
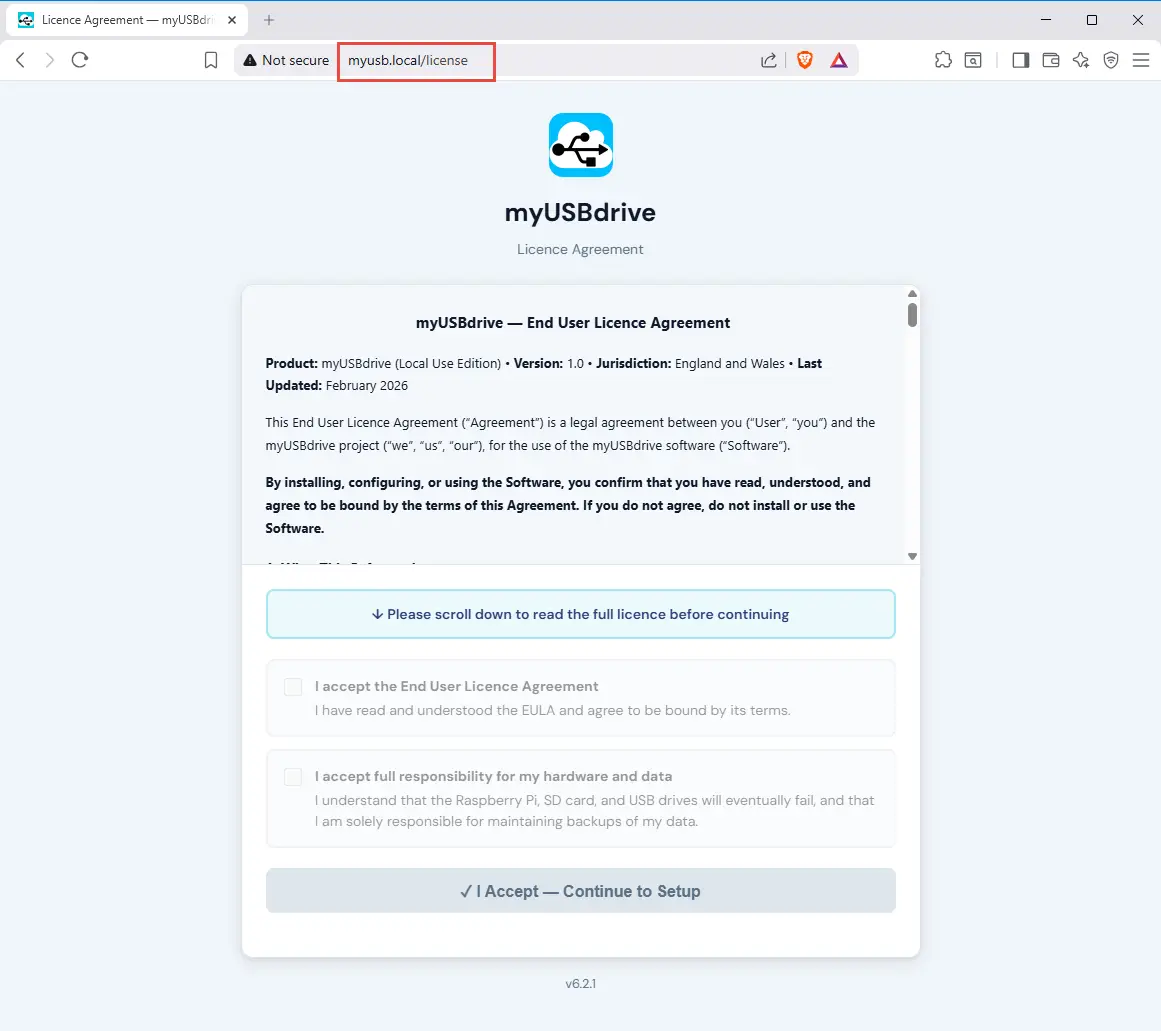
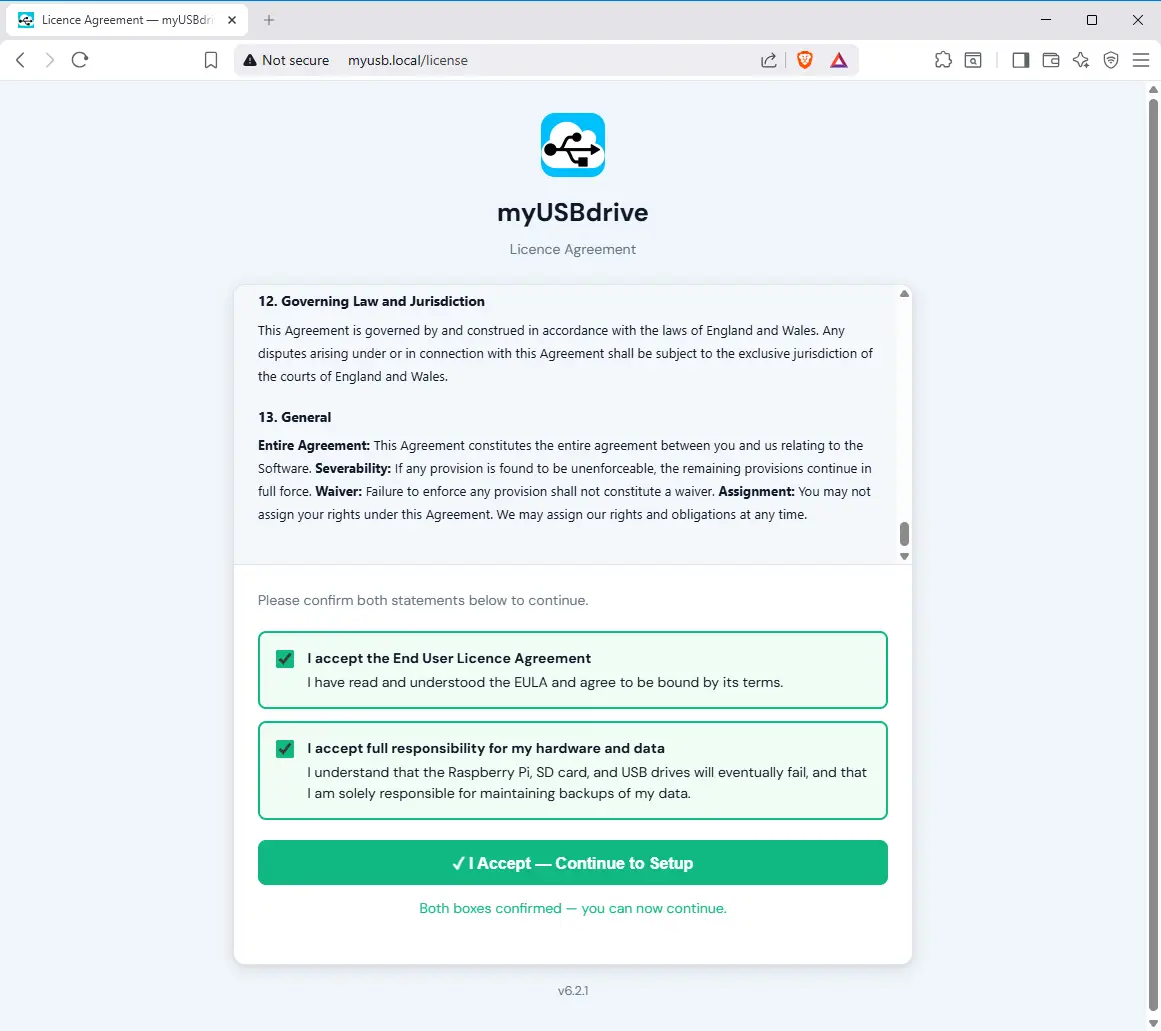
The first page you'll see is the End User Licence Agreement. Please read it in full.
Tick both boxes to confirm you accept the licence and understand that you are responsible for your own hardware and data, then click I Accept — Continue to Setup.
 Click a picture to enlarge it
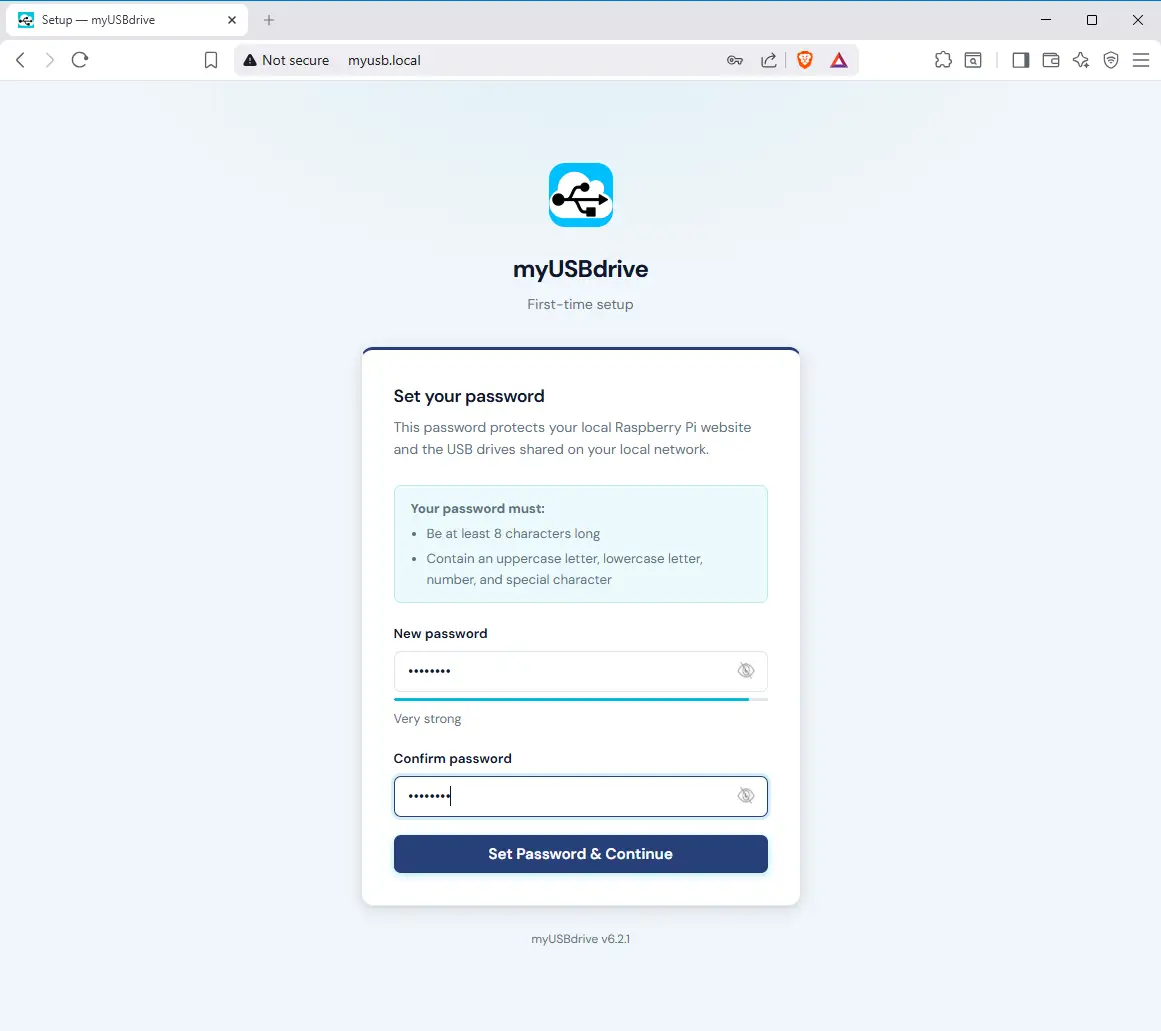
Set your password
Choose a strong password for your myUSBdrive. This protects access to your files both on the local network and, if you add remote access, from the internet. Keep it somewhere safe.
 Click a picture to enlarge it
You're in
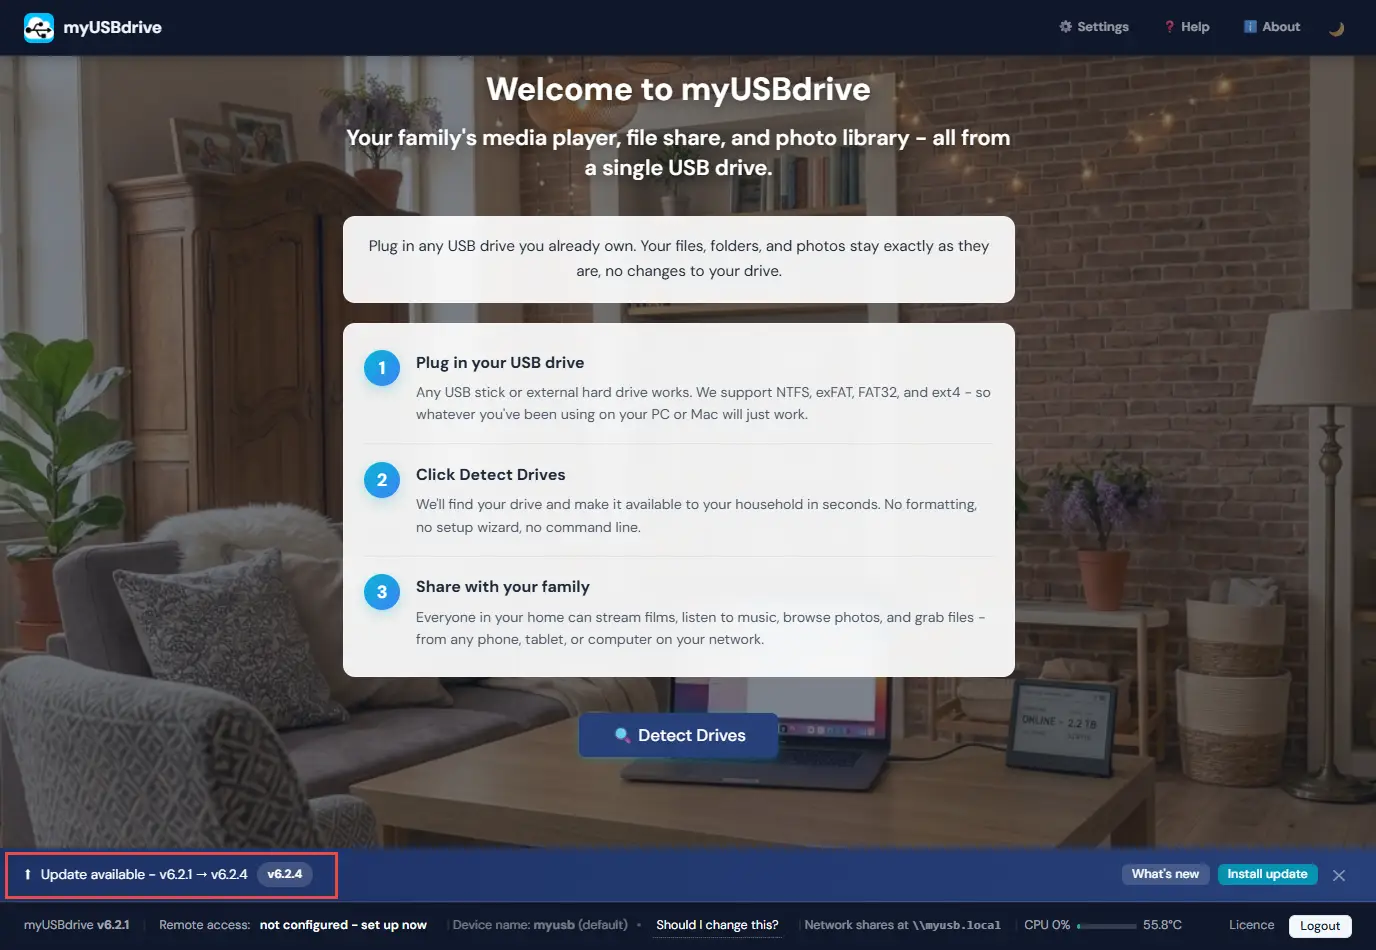
After setting your password you'll land on the myUSBdrive dashboard. Now plug in your USB drive and click Detect Drives. Your files are then available on your home network. If myUSBdrive detects a newer version of the software, an update prompt will appear at the bottom of the screen (see Part 3 below).
 Click a picture to enlarge it
Part 3: Installing updates
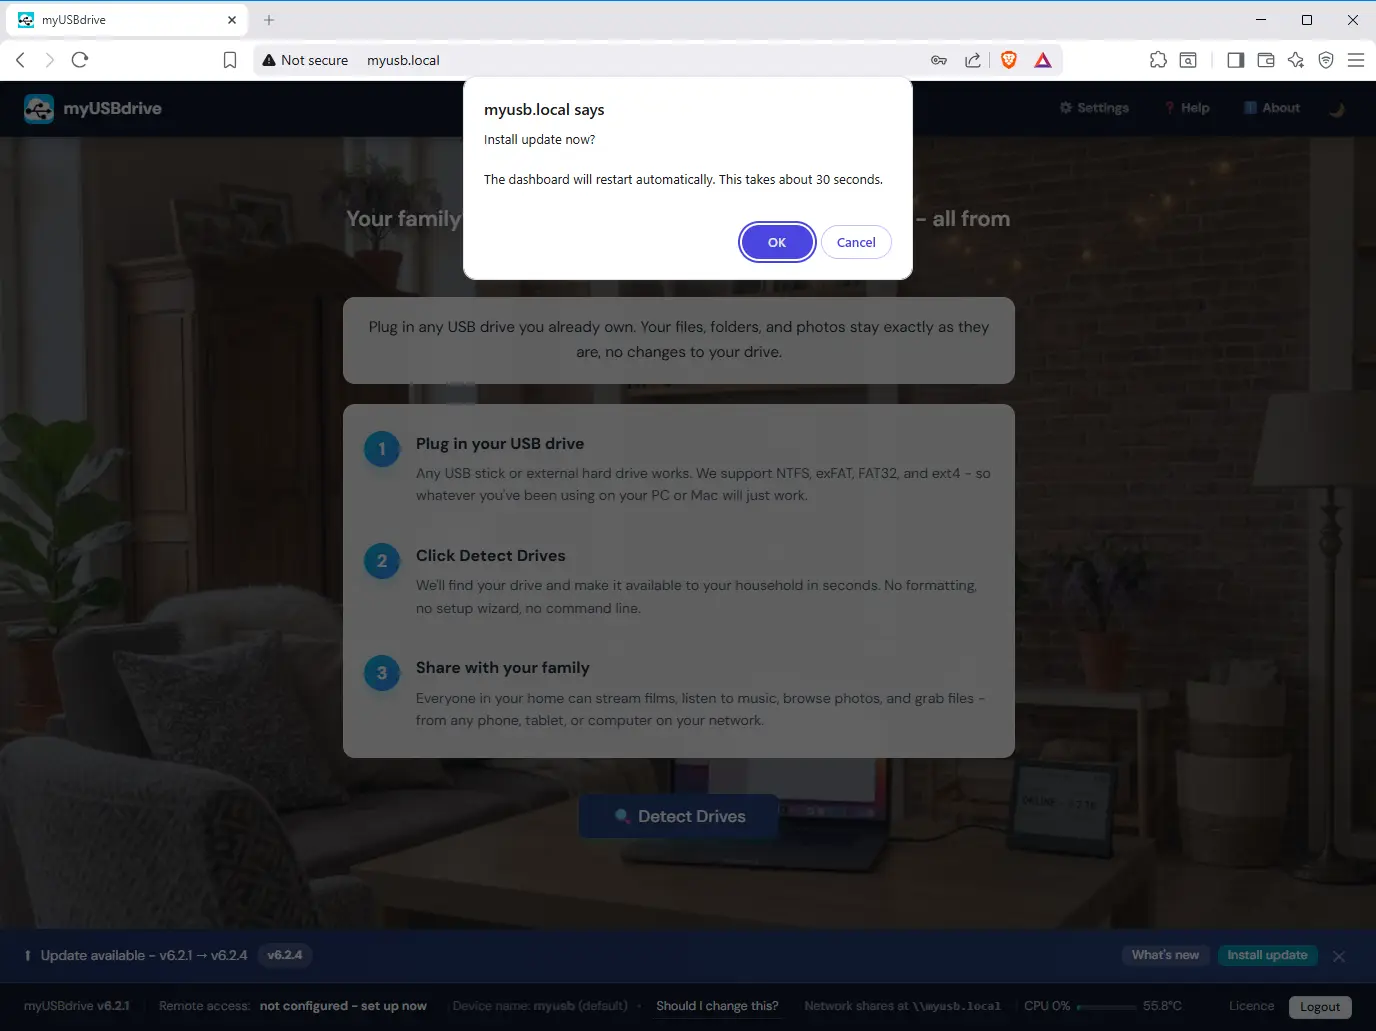
Whenever a new version comes outmyUSBdrive checks for updates automatically. When a new version is available you'll see a notification bar at the bottom of the dashboard. Updates are applied through the browser, with no SSH or command line required.
Install the update
Click Install update in the notification bar. You'll be asked to confirm before anything is changed.
 Click a picture to enlarge it
Update in progress
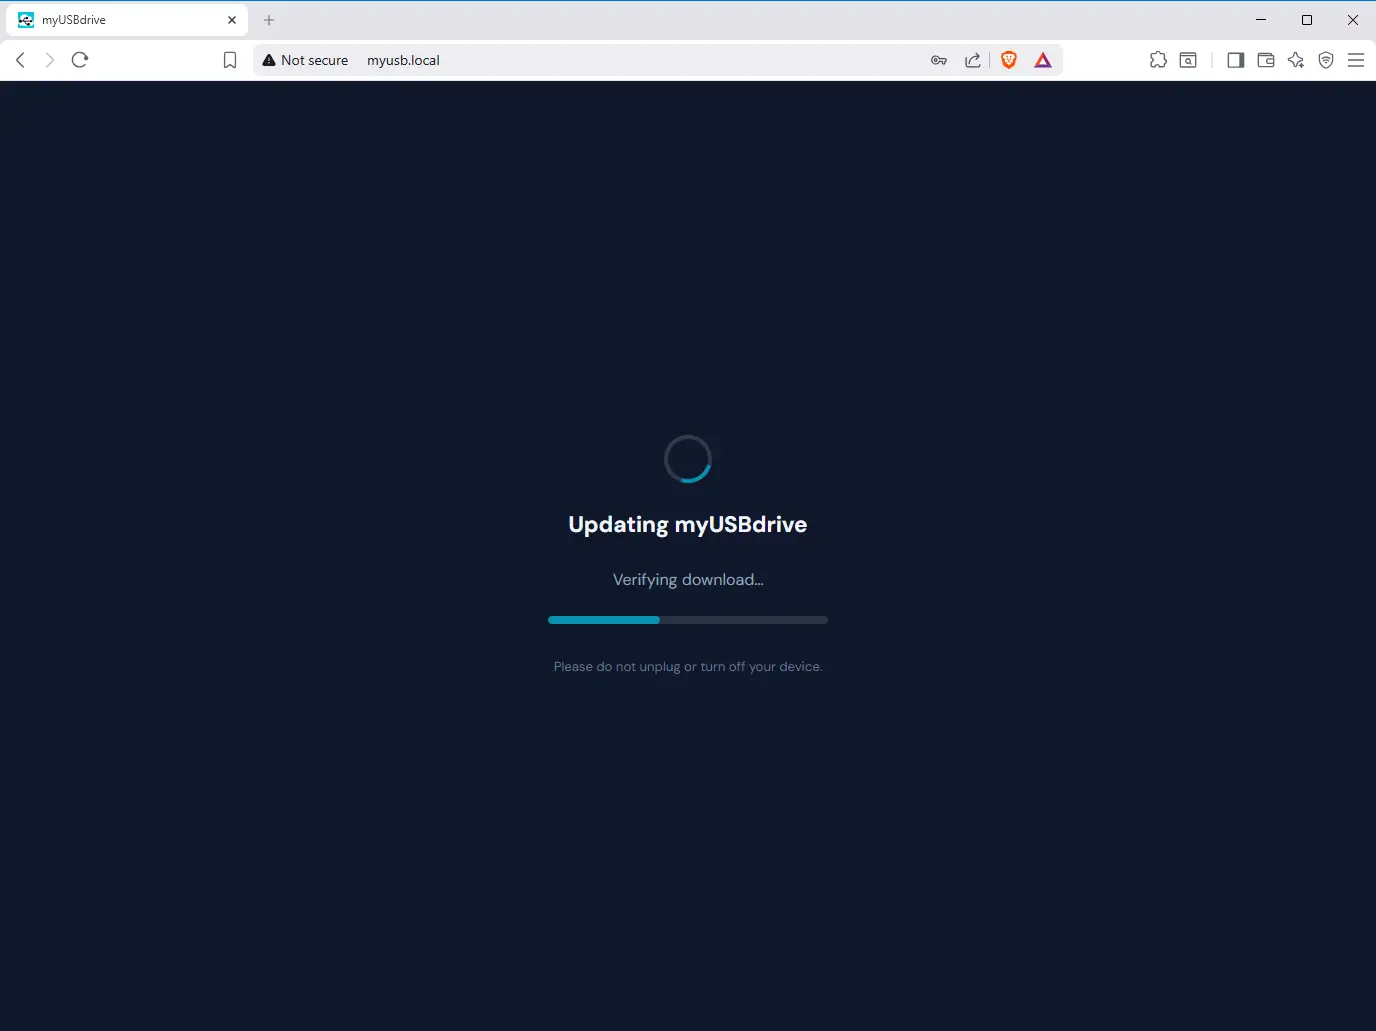
myUSBdrive downloads and verifies the update package, then installs it. The Pi will restart automatically when it's done. This typically takes about two minutes.
 Click a picture to enlarge it
Sign in again
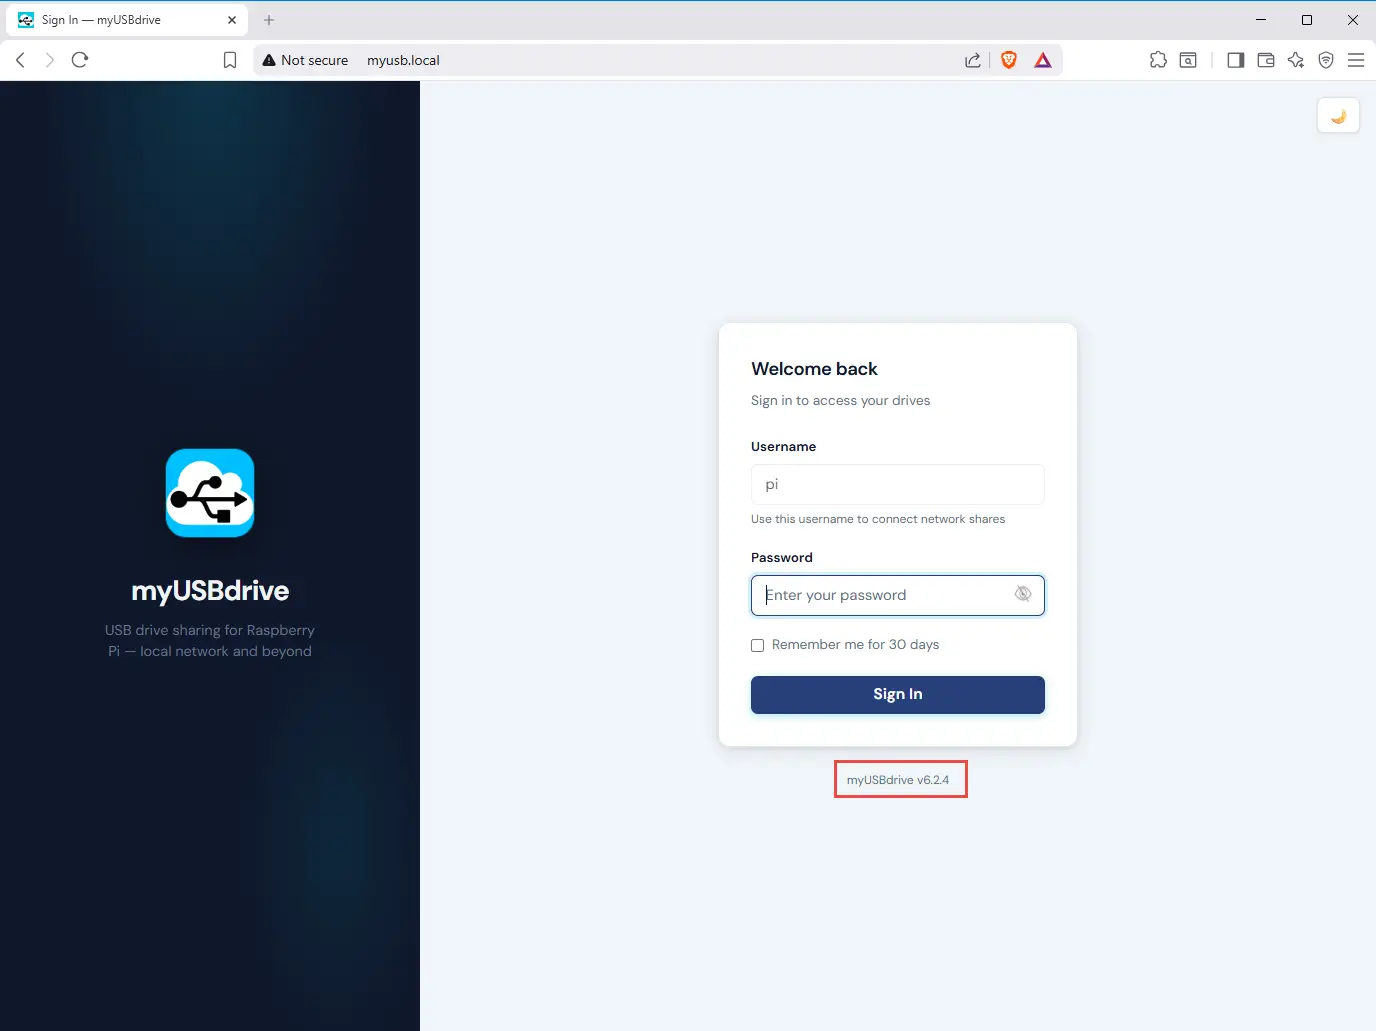
After the Pi restarts, refresh the page and sign in with your password. The version number in the bottom right confirms the update was successful.
 Click a picture to enlarge it